Sunday, July 31, 2011

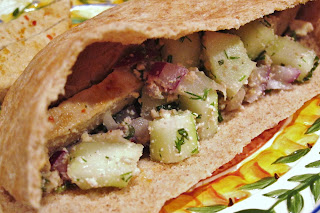
Hot German Potato Salad

It wouldn't be summer without potato salad.  The puzzle, of course, is how to keep this summer standard fresh and new.  This version gets a German twist, in the form of Tofurky kielbasa, Lightlife bacon, and a warm vinegar dressing.

Ingredients:
  • 2 pounds small red potatoes
  • 6 tablespoons white wine vinegar, divided
  • Cooking spray
  • 1/2 cup finely chopped red onion
  • 1 (4-ounce) diced Tofurky kielbasa
  • 1/2 cup vegan chicken broth (prepared from Not Chick'n bouillon)
  • 3 cooked and crumbled Lightlife bacon slices
  • 1 teaspoon caraway seeds
  • 1/2 teaspoon salt
  • 1/4 teaspoon black pepper
  • 1/2 cup minced fresh parsley
1. Place the potatoes in a saucepan and cover with water.  Bring to a boil, then reduce heat and simmer for 10 minutes, until tender. 

Note: one of the tricks to perfect potato salad is to make sure that all of the potatoes are roughly the same size; that way they will all finish cooking at the same time.


2. Drain and let the potatoes cool slightly, then cut each potato in half lengthwise.  Cut the halves crosswise into 1/4-inch thick slices.  Place in a bowl and sprinkle with 2 tablespoons of the white wine vinegar.

2. Heat a large skillet coated with cooking spray over medium heat.  Add the red onion and kielbasa; cook for 3 minutes.  Add the remaining 1/4 cup white wine vinegar, chicken broth, and bacon; bring to a boil, then continue to cook for 1 minute.  Stir in the caraway seeds, salt, and black pepper.

4. Pour the warm vinegar mixture over the potato slices and toss gently.  Sprinkle with the parsley.  As per the title of the recipe, you'll want to serve this dish immediately, while it's hot.  I recommend grilling the remaining Tofurky kielbasa in the package for the main course, and rounding out the meal with fresh summer fruit such as watermelon.

Nutrition Info:
6 servings (1 cup), Calories 195

Tasting Notes:
You are in for a treat if you make this recipe - great flavor from the licorice-notes in the caraway, the spicy kielbasa, the tangy vinegar, the bright fresh parsley, and the perfectly tender potatoes.  I kept trying to think of something I would change or improve, but couldn't, so it gets a "5" in my book.

Rating:
5

Friday, July 29, 2011

Fresh Corn Cake with Raspberries

Summer dinners deserve equally summery desserts - sneak pureed fresh corn and fresh raspberries into this easy cake for a dessert that's bursting with flavor.

Ingredients:
  • Cooking spray
  • 1 cup fresh corn kernels
  • 6 tablespoons melted and cooled vegan butter
  • 1/3 cup water
  • 2 teaspoons fresh-squeezed lemon juice
  • 2 teaspoons vanilla extract
  • 2 Ener-G eggs
  • 2 cups all-purpose flour
  • 1 and 1/4 cups vegan sugar
  • 2 teaspoons baking powder
  • 1 teaspoon salt
  • 1/2 teaspoon baking soda
  • 2 cups fresh raspberries
  • 2 tablespoons all-purpose flour
  • 1 tablespoon vegan powdered sugar
1. Coat a 9-inch round cake pan with cooking spray, and line the bottom of the pan with wax paper.  Coat the wax paper with cooking spray; set aside.

2. Combine the corn, butter, water, lemon juice, vanilla extract, and Ener-G eggs in a blender or food processor; process until smooth.

3. Lightly spoon 2 cups flour into dry measuring cups and level with a knife.  Combine the flour in a bowl with the sugar, baking powder, salt, and baking soda.  Add the corn mixture to the flour mixture and stir just until combined.

4. Toss the raspberries with the remaining 2 tablespoons flour - doing so ensures that the raspberries won't sink in the batter, and won't stain the entire cake pink.  Fold the raspberry mixture into the batter.


5. Pour the batter into the prepared cake pan and bake at 325 degrees for 1 hour - a wooden pick inserted in the center should come out clean.  Cool in the pan for 10 minutes on a wire rack, then remove the cake from the pan and carefully peel off the wax paper.  Cool the cake completely on a wire rack.  Dust with the the powdered sugar for a pretty finish on top.


Nutrition Info:
10 servings (1 wedge), Calories 291 

Tasting Notes:
Whoa - the fresh corn flavor in here nearly blew me away.  So much so, in fact, that I think the raspberries were unnecessary - their strong flavor and the crunch of the raspberry seeds detracted from the moist corn cake batter, and next time I would leave them out, and just serve fresh fruit on the side.  Yet even as is, this cake is a great stand-by recipe for summer, and could do double duty as coffee cake for breakfast.

Rating:
3.5

Thursday, July 28, 2011

Summer Fruit Salad with Lemon-and-Agave Syrup

Gather up the best fruits you see at the market and you'll have this fruit salad.  Use the ingredients below as a template - plums, nectarines, or berries would all also be delicious here. 

Ingredients:
For the syrup:
  • 1 cup water
  • 1/3 cup agave nectar
  • 2 tablespoons fresh-squeezed lemon juice
  • 1/2 teaspoon vanilla extract
For the salad:
  • 3 cups peeled and chopped cantaloupe
  • 2 cups seedless grapes
  • 1 and 1/2 cups pitted and halved sweet cherries
  • 1 and 1/2 cups peeled and chopped peaches
  • 6 fresh figs, cut into quarters
  • 3 or 4 quartered and pitted apricots (about 8 ounces)
  • 1/2 cup chopped fresh mint
1. Combine the water, agave, lemon juice and vanilla extract in a small saucepan.  Bring to a boil, then reduce heat to medium and cook until reduced to 1/4 cup; this step took considerably longer than I expected - a good half hour - so plan your timing accordingly.


2. Meanwhile, combine the cantaloupe, grapes, cherries, peaches, figs, and apricots in a large bowl.  Pour the reduced syrup over the fruit and toss gently to combine.  Cover and chill for 1 hour, stirring occasionally.

3. Just before serving, toss in the mint.

I served this salad as part of a summer repast - toasted millet with fresh corn, sliced avocado, and heirloom tomatoes in a light vinaigrette.


Nutrition Info:
8 servings (1 cup), Calories 149 

Tasting Notes:
This salad was a bit hit-or-miss, only insofar as some of the fruits were better and fresher than the others.  Notably, I would omit the grapes next time - they weren't ideally suited for soaking in the agave syrup, and were a touch sour to boot.  The figs, apricots, peaches, and cherries, on the other hand, were bursting with great flavor.  I would have liked a much thicker agave syrup, and was disappointed to find it so thin even after all that time spent simmering down; next time, I might just drizzle agave nectar over the salad just before serving.  Still, this is a great template for a summer fruit salad, and my caution is simply to make sure you pick the best fruits available, rather than sticking to the ingredient list.

Rating:
3

Wednesday, July 27, 2011

Chilled Cucumber Soup with Cilantro and Cumin

I'm just back from a 10-day honeymoon in Italy, with a whirlwind tour of Venice, Tuscany, and Lake Como.  Italy was amazing (bonus points for the freshest eggplant and tomatoes I've ever eaten), but it's nice to be home and cooking tonight.

One thing I didn't get a lot of in Italy was soy, so I jumped on this soup for the double-dose from the soy milk and soy yogurt - of course, use rice, almond, or coconut-based versions of the milk and yogurt if you prefer.  Because cucumbers take center stage, it's worth a trip to your local farmers' market for the freshest ones you can find. 

Ingredients:
  • 1 teaspoon ground cumin
  • 2 cups peeled, seeded, and shredded cucumber
  • 2 cups plain non-dairy milk
  • 3 cups plain non-dairy yogurt
  • 3 tablespoons chopped fresh cilantro
  • 3 tablespoons fresh-squeezed lemon juice
  • 2 teaspoons olive oil
  • 1/2 teaspoon salt
  • 1/4 teaspoon black pepper
  • 2 minced garlic cloves
  • 1 tablespoon fresh cilantro leaves
1. Cook the cumin in a small skillet over medium heat for 1 minute, until toasted.

2. Combine the cumin in a large bowl with all of the remaining ingredients, except the 1 tablespoon cilantro leaves.  Cover and chill for 1 hour.

3. Ladle 1 cup of soup into each of 6 bowls.  Sprinkle each serving with 1/2 teaspoon cilantro leaves.


The soup has a wonderful creaminess that makes it perfect as a first course before a spicy entree.  If you're not up for cooking both courses tonight, cheat and serve with one of the Mexican entrees from Amy's frozen line.  If you have time on your hands, browse some of the New Mexican-style entrees I posted earlier this month. 

Nutrition Info:
6 servings (about 1 cup), Calories 135 

Tasting Notes:
Even better than I imagined, which is always a nice surprise.  Great fresh cucumber, and wonderful thick creaminess from the yogurt, but my favorite part was the cumin - yum.  What great toasty/spiciness it gave to each bite.  I would have rated this recipe higher for flavor, except that I didn't love the texture.  Next time I would puree the whole mixture for a smooth soup, since I didn't like the shredded bits of cucumber and cilantro pieces swimming around.

Rating:
3.5

Sunday, July 17, 2011

Watermelon and Mango Salad with Citrus Dressing

Before I launch into tonight's post, a much-needed shout out to Currier and Chives catering - wow!  What an extraordinary vegan feast chef Todd Boule prepared for the guests at my wedding - pepper-crusted seitan steak, a roasted vegetable tower with Indian-spiced chickpeas, amazing hors d'oeuvres during cocktail hour, and the most decadent chocolate fondue for dessert.

Many thanks as well to Cakes to Remember - guests came up to me in awe, declaring the cake was one of the yummiest they'd ever eaten, and they couldn't believe it was vegan.

Thank you all for helping me show people a vegan wedding could be delicious and cruelty-free.

What to do for brunch the morning after a splendid affair?  Simple and fresh came to mind.  Pick up the freshest watermelon you can from your farmers' market and do barely a thing to it; you'll have the perfect summer fruit salad.

Ingredients:
  • 5 cups cubed seedless watermelon
  • 1 and 1/2 cups cubed and peeled ripe mango
  • 3 tablespoons orange juice
  • 1 teaspoon grated lime rind
  • 1 tablespoon fresh-squeezed lime juice
  • 2 teaspoons agave nectar
  • 6 mint leaves
1. Combine the watermelon and mango in a bowl.  Whisk together the orange juice, lime rind, lime juice, and agave in a small bowl, and drizzle over the fruit mixture.


2. Cut the mint leaves into thin strips, and sprinkle over the salad.

Nutrition Info:
4 servings (1 and 1/2 cups), Calories 107 

Tasting Notes:
I love recipes like this with so few ingredients - great sweet watermelon and mango were the stars of the show, with lovely, subtle hints of orange, lime, and agave.  A great all-purpose fruit salad.

Rating:
3.5

Wednesday, July 13, 2011

Cucumber-Feta Salsa with Pita Crisps

This recipe is a great way to highlight cucumbers fresh from the farmers' market.

Ingredients:
For the pita crisps:
  • 3 (8-inch) pitas
  • Cooking spray
  • 1/4 teaspoon salt
For the salsa:
  • 1 cup crumbled vegan feta (such as Sunergia)
  • 2 tablespoons fresh-squeezed lemon juice
  • 1/4 teaspoon black pepper
  • 1 and 1/2 cups peeled, seeded, and cubed cucumber
  • 1 cup finely chopped red onion
  • 3 tablespoons chopped fresh mint
  • 3 tablespoons chopped fresh dill
  • 8 lemon wedges
1. Very carefully cut each pita in half horizontally (i.e. separating the halves around the pocket in the middle).  Cut each pita half into 8 wedges - you'll have 48 pita wedges total.  Arrange the pita wedges in a single layer on baking sheets coated with cooking spray; lightly coat the pita wedges with cooking spray and sprinkle with the salt.  Bake at 350 degrees for 10 minutes.


2. Meanwhile, combine the feta, lemon juice, and black pepper in a bowl; partially mash with a fork.  Add the cucumber, onion, mint, and dill.


3. Serve the salsa with the pita chips, and with the lemon wedges on the side - a spritz of fresh lemon juice either over the salsa or directly onto the pita crisp makes for a great burst of flavor.


Nutrition Info:
8 servings (6 pita crisps, 6 tablespoons salsa, 1 lemon wedge), Calories 135 

Tasting Notes:
Very fresh and crisp, with wonderfully crumbly feta in each bite.  I would play up the lemon juice by adding more to the salsa itself next time.  As enjoyable as the salsa was with the pita crisps as an appetizer, I found it even yummier when added to a pita stuffed with cooked Gardein chicken, for a quick sandwich.  Try it both ways and see which you prefer.

Rating:
3

In other news, this is my last post as a single woman.  I'm getting married on Saturday, and will follow up with full details of the vegan menu and vegan wedding cake!

Monday, July 11, 2011

Christmas Chilaquiles

My adventures in New Mexican cuisine are over for now - it's been a fun week with different scents and preparations in my kitchen from the usual.  The end, of course, means that it's leftovers night, and that's precisely what chilaquiles ("greens in chile broth") is meant for - with this dish, you can use up the last of your New Mexican Red Chile Sauce, Green Chile Sauce, Roasted Anaheim Chiles and more.

The term "Christmas" here might seem confusing in the middle of summer.  It refers to the color combination of the red and green sauces, however, not the holiday, so feel free to make this dish all year long. In fact, I recommend making it now, while corn is at its freshest, rather than in the winter months.

Ingredients:
  • Cooking spray
  • 2 cups fresh corn kernels
  • 2 cups (1/4-inch) diced zucchini
  • 1 cup chopped red bell pepper
  • 1 cup chopped onion
  • 1/2 cup Roasted Anaheim Chiles
  • 1 teaspoon dried oregano
  • 3 minced garlic cloves
  • 2 ounces baked tortilla chips
  • 1 cup shredded vegan Monterey Jack (such as Vegan Gourmet)
  • 2 cups Green Chile Sauce
  • 2 cups New Mexican Red Chile Sauce
1. Heat a large skillet coated with cooking spray over medium-high heat.  Add the corn, zucchini, red bell pepper, and onion; saute for 6 minutes.  Add the Anaheim chiles, oregano, and garlic; saute for 2 minutes

2. Arrange half of the tortilla chips (about 1 cup), in the bottom of an 11x7-inch baking dish coated with cooking spray.  Spread half of the corn mixture (about 2 and 1/4 cups) evenly over the chips, and sprinkle with 1/2 cup of the Monterey Jack.  Repeat the layers with the remaining tortilla chips, remaining corn mixture, and remaining 1/2 cup cheese.


3. Bake at 350 degrees for 10 minutes.  Divide into 8 portions, and top each serving with 1/4 cup red sauce and 1/4 cup green sauce - Christmas style!

Nutrition Info:
8 servings (1 portion), Calories 195

Tasting Notes:
Certainly a useful way to use up leftovers, but there were a couple things I would change about this dish.  It felt like too much like a mish-mash, and I would definitely use whole corn tortillas next time, instead of a few baked tortilla chips.  I also wanted more tortilla (whether chips or whole ones), alongside all the vegetables.  The contrast between the light green sauce and earthy red sauce was really nice on top though, and the fresh corn was fabulous.

Rating:
3

Sunday, July 10, 2011

Posole

My culinary trip to New Mexico wouldn't be complete without preparing posole.  A soup made with hominy (white corn), the dish also traditionally features pork and the ubiquitous New Mexican chiles.  Thanks to the amazing folks at Match meats, it's possible for a vegan to make posole using Match pork.

Ingredients:
  • 18 ounces Match pork, thawed
  • Cooking spray
  • 1 cup chopped onion
  • 3 minced garlic cloves
  • 2/3 cup Roasted Anaheim Chiles
  • 1 tablespoon New Mexico chile powder*
  • 1 teaspoon ground coriander seeds
  • 1 teaspoon ground cumin
  • 1 teaspoon dried oregano
  • 1/2 teaspoon salt
  • 1 (29-ounce) drained can white hominy
  • 1 and 3/4 cups vegan chicken broth (prepared from Not Chick'n bouillon)
  • 1 and 3/4 cups vegan beef broth (prepared from Not Beef bouillon)
  • 3/4 cup crushed baked tortilla chips**
  • 6 tablespoons thinly sliced radishes
  • 6 tablespoons finely chopped onion
  • 1/4 cup chopped fresh cilantro
  • 6 lime wedges
1. Heat a Dutch oven coated with cooking spray over medium-high heat.  Cut the Match pork into 5 or 6 pieces and add to the pan; cook for 2 minutes on each side.  Add the onion and garlic; saute for 2 minutes.

2. Stir in the Anaheim chiles, chile powder, coriander, cumin, oregano, salt, hominy, and both the chicken and beef broths; bring to a boil, then cover, reduce heat and simmer for 1 and 1/2 hours.

Note: if you're pressed for time, you don't technically need to simmer the stew this long; Match pork cooks far faster than real pork, and about 20 minutes should be enough.  However, I wanted to let my stew simmer so the flavors could really blend.  It also meant that the wonderful, simmering soup lived up to its name - posole, after all, means "foamy."


3. Remove the pork pieces from the soup and chop into bite-sized pieces; return to the pan.  Ladle 1 and 1/3 cups of soup into each of 6 bowls.  Top each serving with 2 tablespoons crushed chips, 1 tablespoon radishes, 1 tablespoon finely chopped onion, 2 teaspoons cilantro, and 1 lime wedge.

*For the full run down on New Mexico chile powder, see my post for New Mexican Red Chile Sauce.

**The easiest way to crush the tortilla chips is to place in a zip-top plastic bag and crumble with your fingers or a rolling pin into smaller pieces.

Nutrition Info:
6 servings (1 and 1/3 cups soup, 2 tablespoons chips, 1 tablespoon radishes, 1 tablespoon onion, 2 teaspoons cilantro, 1 lime wedge), Calories 263 

Tasting Notes:
A super flavorful soup - the broth was similarly spiced to chile, but the ingredients were fresher and lighter.  I particularly loved the crunch of the tortilla chips on top, the peppery contrasting bite of the radish, the fresh spritz of lime, and the chewy texture of the hominy.  I haven't had much hominy in the past, but while eating this soup it occurred to me that it's kind of a chewy version of popcorn - yum!  This soup is a meal in itself, no need to prepare anything extra on the side.  

Rating:
4

Saturday, July 9, 2011

Santa Fe Red Chile Enchiladas

Consider this dish the alter ego of the Green Chile and Chicken Enchiladas I made a few nights back - red sauce instead of green sauce, Match pork instead of Gardein chicken, and vegan cheddar in place of the Sunergia feta.... It's essentially the same preparation, but with different flavors.  Once again, the ingredients are stacked in two piles, rather than rolled, and then cut in half to serve.

Ingredients:
  • Cooking spray
  • 8 ounces Match pork, thawed
  • 1/2 teaspoon canola oil
  • 1 cup chopped onion
  • 3 minced garlic cloves
  • 1 teaspoon dried oregano
  • 1/4 teaspoon salt
  • 1/8 teaspoon black pepper
  • 1 and 3/4 cups New Mexican Red Chile Sauce
  • 6 (6-inch) corn tortillas
  • 1/4 cup shredded Daiya cheddar
1. Pat the Match pork into a 1/2-inch thick layer on a baking sheet coated with cooking spray, and bake at 400 degrees for about 18 minutes, until the outside is crisp.  Shred with a fork; set aside.

2. Heat the canola oil in a skillet over medium-high heat.  Add the onion and saute for 4 minutes.  Add the garlic; saute for 1 minute.  Remove from heat and stir in the shredded pork, dried oregano, salt, and black pepper.

3. Spread 1/4 cup New Mexican Red Chile Sauce in the bottom of an 11x7-inch baking dish coated with cooking spray.  Place 2 of the tortillas over the sauce.  Top evenly with half of the pork mixture and 1/2 cup red sauce.  Repeat the layers - 2 tortillas, the remaining pork mixture, and 1/2 cup sauce - and top each stack with a final tortilla.  Spread evenly with the final 1/2 cup red sauce, and sprinkle with the Daiya cheddar.


4. Bake at 350 degrees for 20 minutes.  Cut each tortilla stack in half.

Nutrition Info:
4 servings (1/2 a tortilla stack), Calories 294 

Tasting Notes:
Sadly, I was disappointed with the flavor of this dish.  I found that the red chile sauce dominated to the detriment of everything else, so that I could hardly taste the pork mixture (which smelled so good when mixed with the onions and oregano during preparation) the cheddar on top, or even the tortillas.  I guess that makes me a green chile sauce girl all the way, since I really enjoyed my green chile enchiladas.  However, if you've made the red chile sauce and really loved it, then this dish is for you.

Update: I enjoyed these much better reheated the next day for lunch - perhaps the flavors had time to coalesce, but the red sauce was no longer so dominant.  My preference is still for the green over the red enchiladas, however.

Rating:
2

Friday, July 8, 2011

Huevos Rancheros

Huevos Rancheros or "Ranch-style eggs" is a traditional Mexican breakfast consisting of eggs and tomato-chile sauce on a fried corn tortilla.  This dish is a fun way to use both the green and red sauces I've made in the past week.  Just ask before serving whether someone wants their meal "green," "red," or "Christmas style" (i.e. both).  As to the huevos, I used the most basic recipe I know for a tofu omelet to make the tofu eggs that sit in the center of this dish.  Although I used yellow corn tortillas, you might also try blue or white corn tortillas, for a fun variation.

Ingredients:
  • 4 (6-inch) corn tortillas
  • Cooking spray
  • 1 cup chopped onion
  • 1/2 cup chopped green bell pepper
  • 3 minced garlic cloves
  • 1/4 cup canned chopped green chiles
  • 2 teaspoons New Mexico chile powder*
  • 1 teaspoon ground cumin
  • 1 teaspoon dried oregano
  • 1/2 teaspoon hot sauce (such as the Wizard)
  • 1 (14.5-ounce) undrained can diced tomatoes
  • 8 ounces silken tofu
  • 1 tablespoon cornstarch
  • 1 tablespoon water
  • 1/4 teaspoon ground turmeric (for color)
  • New Mexican Red Chile Sauce or Green Chile Sauce
  • 1/4 cup shredded vegan Monterey Jack (such as Vegan Gourmet)
  • 2 teaspoons chopped fresh cilantro
1. Place the tortillas on a baking sheet and coat with cooking spray.  Bake at 350 degrees for 12 minutes, until crisp.


2. Meanwhile, heat a large skillet coated with cooking spray over medium-high heat.  Add the onion, green bell pepper, and garlic; saute for 3 minutes.  Add the green chiles, New Mexico chile powder, cumin, oregano, hot sauce, and canned tomatoes; bring to a boil, then cook for 3 minutes, until thick.

3. While the tomato mixture cooks, combine the tofu, cornstarch, water, and turmeric in a food processor and process until smooth.  Heat a skillet coated with cooking spray over medium heat.  Add the tofu mixture in 4 portions, to make the equivalent of 4 eggs; cook for about 6 minutes, agitating occasionally with a spatula, until yellow in color and mostly set.


4. Place 1 tortilla on each of 4 plates.  Top each tortilla with 1/2 cup tomato mixture and 1 tofu egg.  Spoon 1 tablespoon sauce over each tortilla according to taste - red, green, or Christmas style. Sprinkle each tortilla with 1 tablespoon Monterey Jack and 1/2 teaspoon cilantro.

*For the full run down on New Mexico chile powder, see my post for New Mexican Red Chile Sauce.

Nutrition Info:
4 servings (1 topped tortilla), Calories 222

Tasting Notes:
The topping was so jam-packed with flavor I hardly know where to begin.  Great spice from the sauce (my preference was for the green), creamy Monterey Jack, rich dense tomato flavor, and the light fluffiness of my tofu eggs.  The only reason this didn't verge into "5" territory is that I didn't like the contrast of the crisp corn tortilla.  My preference would be to prepare these on soft flour tortillas, even though that's not how huevos rancheros are traditionally prepared.

Rating:
4

Thursday, July 7, 2011

Green Chile and Chicken Enchiladas

Tonight, I'm using previously-made Green Chile Sauce to smother traditional New Mexican enchiladas.  Unlike the familiar version of enchiladas, in which tortillas are rolled around a filling, in this version the tortillas are stacked and then cut in half before serving.

Ingredients:
  • 1/2 teaspoon canola oil
  • 1 cup chopped onion
  • 2 minced garlic cloves
  • 1 cup cooked and shredded Gardein chicken breast*
  • 1/4 teaspoon salt
  • 1/4 teaspoon black pepper
  • 2 cups Green Chile Sauce
  • Cooking spray
  • 6 (6-inch) corn tortillas
  • 1/4 cup crumbled vegan feta (such as Sunergia)
1. Heat the canola oil in a skillet over medium-high heat.  Add the onion and saute for 4 minutes.  Add the garlic and saute for 1 minute.  Combine the onion mixture in a bowl with the chicken, salt, and pepper.

2. Spread 1/4 cup of the Green Chile Sauce in the bottom of an 11x7-inch baking dish coated with cooking spray.  Arrange 2 tortillas over the sauce.  Top evenly with half of the chicken mixture and 1/2 cup Green Chile Sauce.  Repeat the layers - 2 tortillas, the remaining chicken mixture, and 1/2 cup sauce - and finish with the final 2 tortillas.  Spread the remaining 3/4 cup sauce over the tortillas.  Sprinkle with the feta.


3. Bake at 350 degrees for 20 minutes.  Cut each tortilla stack in half.

*If you can find Gardein chick'n strips, use those in this recipe, heated according to package directions.  Another option is to cook Gardein Tuscan chicken breasts and shredded with a fork to equal 1 cup (about 1 and 1/2 chicken pieces).  You can also cook and shred Match chicken, if that is your preferred brand.

Nutrition Info:
4 servings (1/2 a tortilla stack), Calories 227 

Tasting Notes:
I was a little worried while assembling the enchiladas, because the filling looked meager - but I need not have fretted one bit.  The end result was delicious - a wonderful showcase for the fresh cilantro and tomatillo of the Green Chile Sauce, great salty contrast from the feta, and wonderfully tender tortilla stacks.  My only change would be to increase the chicken next time... but not too much, so the Green Chile Sauce can still shine.  My only other complaint is that it was hard to dish the tortilla halves out of the pan without them falling apart.  Still, it will only affect the aesthetic look of the dish, but not the taste.

Rating:
4

Wednesday, July 6, 2011

Granny Smith-Green Chile Salsa

My New Mexican recipes from the past couple of nights are starting to come together now.  Use some of the Roasted Anaheim Chiles for this salsa; pairing the chiles with green apple is a great combination of tart and hot flavors.

Ingredients:
  • 2 tomatillos (about 4 ounces)
  • 1 cup chopped Granny Smith apple
  • 1/2 cup chopped onion
  • 1/2 cup Roasted Anaheim Chiles
  • 3 tablespoons chopped fresh cilantro
  • 3 tablespoons fresh-squeezed lime juice
  • 1/4 teaspoon salt
  • 1/4 teaspoon white pepper
1. Discard the husks and stems from the tomatillos, and cook in boiling water for 10 minutes, until tender.  Drain.

2. Place the tomatillos in a blender and process until smooth.  Combine the pureed tomatillos in a bowl with all of the remaining ingredients.


I found this salsa to be particularly great with Match pork tacos in soft flour tortillas. 


Nutrition Info:
6 servings (1/3 cup), Calories 42 

Tasting Notes:
I loved the combination here, of crunchy, tart Granny Smith and tender, mildly hot green chiles.  The fresh lime juice was just perfect.  This was almost good enough simply to eat by the spoonful, but once paired with savory Match meat and flour tortillas, the salsa was even better.  

Rating:
3.5

Tuesday, July 5, 2011

Green Chile Sauce

Last night's sauce was red, and tonight's is green.  Here is the second of the two sauces that grace many New Mexican entrees.  If you don't feel like preparing an entree to go with the sauce, you can also use it for dipping tortilla chips.

Ingredients:
  • 7 tomatillos (about 12 ounces)
  • 1 cup vegan chicken broth (prepared from Not Chick'n bouillon)
  • 1/3 cup chopped fresh cilantro
  • 1/3 cup Roasted Anaheim Chiles
  • 1/4 cup chopped onion
  • 1/2 teaspoon salt
  • 1/4 teaspoon black pepper
  • 2 chopped garlic cloves
1. Discard the husks and stems from the tomatillos.  Cook the tomatillos in boiling water for 10 minutes, until tender - they will turn from a bright green to an almost-sage green as they cook, which is a fun transformation to watch.  Drain.

2. Combine the tomatillos in a blender with all the remaining ingredients, and process until smooth.


As with the New Mexican Red Chile Sauce I made last night, I prepared two batches of the green sauce tonight, in anticipation of upcoming recipes.  Stay tuned!

Nutrition Info:
12 servings (1/4 cup), Calories 18

Tasting Notes:
Definitely my favorite of the two sauces - now I know to order my enchiladas "green" if I'm ever in New Mexico.  The broth was an unexpected flavor, and gave the sauce a creamy, almost velvety texture.  Great green, fresh flavor from the tomatillo and cilantro.

Rating:
3.5

Monday, July 4, 2011

New Mexican Red Chile Sauce

I'm continuing my exploration of New Mexican cuisine.  Last night I started things off with the simplest of all building blocks - Roasted Anaheim Chiles.  Tonight, I'm making one of two iconic sauces that grace everything from enchiladas to chilaquiles to huevos rancheros.  You'll get the other sauce (green) tomorrow, but tonight I had to go with the red sauce, in honor of the 4th of July. 

Ingredients:
  • 1/2 teaspoon canola oil
  • 1/2 cup finely chopped onion
  • 1/2 cup New Mexico chile powder*
  • 1 minced garlic clove
  • 1 cup canned crushed tomatoes
  • 3 tablespoons agave nectar
  • 1 teaspoon ground cumin
  • 1/4 teaspoon black pepper
  • 1 and 3/4 cups vegetable broth
1. Heat the canola oil in a saucepan over medium-high heat.  Add the onion and saute for 4 minutes.  Add the chile powder and garlic; saute for 1 minute.

2. Stir in the canned tomatoes, agave, cumin, black pepper, and vegetable broth.  Bring to a boil, then reduce heat and simmer for 10 minutes.

This recipe makes enough for 3 cups, but I actually made 2 batches today, in anticipation of upcoming recipes.  For something simple, try the sauce over vegetables or vegan meats.  I had it tonight with sauteed zucchini, yellow bell pepper and Match chicken. Another fun option would be the chorizo from Yves Veggie, since chorizo is a common item in New Mexican cuisine.  The sauce is equally delicious drizzled over flour or corn tortillas with your favorite fillings.  


*The key to this sauce is the New Mexico chile powder - don't be tempted to use regular chili powder in its place.  If you can't find it, a better substitute would be 7 parts sweet paprika mixed with 1 part ground red pepper.  However, I found New Mexico chile powder with ease at Whole Foods, or you can order it online at www.chimayotogo.com 

Nutrition Info:
12 servings (1/4 cup), Calories 43 

Tasting Notes:
The sauce had a wonderful smokiness to it, and the sweet tinge from the agave nectar was a definite plus.  The heat was perfect - warm and toasty, rather than blazing hot.  It does have a slightly grainy texture, no doubt from the half cup of chile powder called for.  Since I've never tried New Mexican red sauce before, I'm not sure if this is always the case, or something to be improved upon - I might consider giving the mixture a whirl in the blender next time, to cut down on the graininess.

Rating:
3

Sunday, July 3, 2011

Roasted Anaheim Chiles

I'm taking a little culinary journey over the next week or so, to the kitchens of New Mexico.  For the first few nights I intend to give you the building blocks (such as these roasted chiles), and then I'll build up to great entrees.

I had to start, of course, with the New Mexican long green chile, also known as Anaheim chiles, which are ubiquitous in New Mexican cuisine.  They provide the basis for Green Chile Sauce, and provide mild heat to stews or enchiladas.  Anaheim chiles get their name because they've been cultivated in the area around Disneyland since 1900, despite their origins in New Mexico, and should be readily available in most supermarkets.

Ingredients:
  • 5 Anaheim chiles
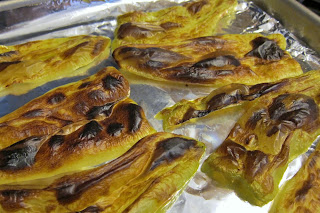
1. Cut the chiles in half lengthwise, and discard the seeds and membranes.  Place on a foil-lined baking sheet, skin sides up, and flatten with the palm of your hand.  Broil for 15 minutes, until blackened.


2. Place the chiles in a large zip-top plastic bag and let stand for 15 minutes.  Peel off the skins (which will slip off easily at this point, although don't fret if you can't get every last little piece), and chop.


Because you'll need to revisit these chiles for recipes I'm making in the nights ahead, consider making several batches at once, and storing the extra in the fridge or freezer.  You can refrigerate the chiles up to two weeks, or freeze for 3 months.

But tonight I'm highlighting the chiles, and I enjoyed them as a condiment over the new veggie beef burgers from Gardein.  You can also try rolling them up in a soft flour tortilla with your favorite taco fixings, for a simple supper.

Nutrition Info:
4 servings (1/4 cup), Calories 19 

Tasting Notes:
To be perfectly honest, the taste was not all that different from canned chopped green chiles, and was very mild in heat.  Still, I get great satisfaction out of knowing that my roasted chiles were homemade, since I am a proponent of cooking from scratch, and the taste was a bit lighter and fresher than the canned alternative.  A simple recipe, so it's worth keeping a batch on hand in fridge or freezer.

Rating:
2

Saturday, July 2, 2011

Chocolate Cinnamon Rolls

Believe it or not, I haven't had a cinnamon roll in a decade.  It was just before college, when I was still vegetarian, but not yet vegan.  After that, I was off at college with no way to bake cinnamon rolls in a college dorm, and vegan versions weren't yet readily available from a local bakery.  Even once in an apartment with a kitchen, I never got around to ordering any of the commercial vegan cinnamon buns, available, at sites like veganessentials.com, and never got around to making my own.

While it was time to remedy the lack.  Chocolate and cinnamon are two of my favorite things, as my fiance will laughingly tell you, so when I spotted this recipe, I had to give it a go.

Ingredients:
  • 1 package dry yeast (2 and 1/4 teaspoons)
  • 2 tablespoons vegan sugar
  • 1 and 1/4 cups warm non-dairy milk (between 100 and 110 degrees)
  • 1/4 cup melted vegan butter
  • 1/2 teaspoon vanilla extract
  • 2 Ener-G eggs, divided
  • 4 cups bread flour, divided
  • 1/3 cup unsweetened cocoa
  • 1/2 teaspoon salt
  • Cooking spray
  • 1/4 cup vegan sugar
  • 1 teaspoon ground cinnamon
  • 1 cup sifted vegan powdered sugar
  • 2 tablespoons plain non-dairy milk
  • 1 teaspoon vanilla extract
1. Dissolve the yeast and 2 tablespoons sugar in the warm milk, and let stand for 5 minutes.  Add the melted butter, 1/2 teaspoon vanilla extract, and 1 Ener-G egg.  Lightly spoon the bread flour into dry measuring cups and level with a knife.  Add 3 and 1/2 cups bread flour, the cocoa powder, and the salt to the yeast mixture, and stir to form a dough. Yum - chocolate dough.

2. Turn the dough out onto a lightly floured surface and knead for about 10 minutes - you want the dough to be smooth and elastic at the end.  Add the remaining 1/2 cup flour as needed, 1 tablespoon at a time, to prevent the dough from sticking to your hands.  I haven't kneaded dough on this blog since the winter, so check out this link for a quick reminder.

3. Place the dough in a large bowl coated with cooking spray, turning so the top of the dough is coated as well.  Cover and let rise some place warm and free from drafts for 45 minutes - a closed, unheated oven makes a great rising spot.

4. Punch the dough down and turn it out onto a lightly floured surface.  Roll into a 16x8-inch rectangle.  Brush the dough with the remaining Ener-G egg.  In a bowl, combine 1/4 cup sugar with the cinnamon; sprinkle evenly over the dough.  Roll the dough up starting at one long side, jelly roll fashion.  Pinch the seam to seal (but do not seal the ends of the roll).


5. Cut into 16 (1-inch) slices, and arrange the slices, cut sides up, in a 13x9-inch metal baking pan coated with cooking spray.  Cover and let rise for 30 minutes.


6. Bake at 350 degrees for 20 minutes.  While the rolls bake, prepare the glaze: whisk together the powdered sugar, 2 tablespoons milk, and 1 teaspoon vanilla extract; drizzle evenly over the rolls.

Nutrition Info:
16 servings (1 roll), Calories 188

Tasting Notes:
Remember how, as a kid, any cereal was that much better simply if it was chocolate?  Well, this was the adult version of that.  Cinnamon rolls, but chocolate, so wow!  I wish that there was a little bit more of a gooey factor - more gooey cinnamon-and-sugar filling, and more drizzled glaze - but the rolls were delicious and made for an indulgent breakfast treat.

Rating:
4

Friday, July 1, 2011

Blueberry Cobbler

Happy July, and happy start to the long weekend.  I thought it best to start off the month with an iconic American dessert to serve over the 4th of July.  Cobblers date back to the Colonial era in New England; settlers tried to recreate puddings from back in England, but had to make do with a filling topped by a plain biscuit, due to the constraints of locally available ingredients. The dish gets its name from the "cobbled-street" appearance of the final product.  Serve up that bit of American culinary history when you serve up this holiday dessert.

Ingredients:
For the filling:
  • 6 cups fresh blueberries
  • 1/3 cup vegan sugar
  • 2 tablespoons cornstarch
  • 1 teaspoon grated lemon rind
For the topping:
  • 1 and 1/3 cups all-purpose flour
  • 2 tablespoons vegan sugar
  • 3/4 teaspoon baking powder
  • 1/4 teaspoon salt
  • 1/4 teaspoon baking soda
  • 5 tablespoons vegan butter
  • 1 cup vegan sour cream*
  • 3 tablespoons plain non-dairy milk
  • 1 teaspoon vegan sugar
1. To prepare the filling, combine the blueberries, 1/3 cup sugar, cornstarch, and lemon rind in an 11x7-inch baking dish; set aside.

2. To prepare the topping, lightly spoon the flour into dry measuring cups and level with a knife.  Combine the flour in a large bowl with 2 tablespoons sugar, the baking powder, the salt, and the baking soda.  Cut the butter into small pieces, and cut into the flour mixture with a pastry blender until the mixture looks like coarse meal.  Stir in the sour cream - a very soft dough will form.

3. Drop the dough by spoonfuls over the blueberry mixture, to form 8 dumplings.  Brush the dumplings evenly with the milk and sprinkle evenly with 1 teaspoon sugar.  Place the baking dish directly onto a jelly roll pan or baking sheet, and bake at 350 degrees for 50 minutes - the filling should be bubbly and the dumplings will be lightly browned.


*When it comes to vegan sour cream, I generally prefer Tofutti or Vegan Gourmet, which closely mimic the taste and texture of dairy versions.  For low-fat baking, however, I've discovered that We Can't Say It's Sour Cream from Wayfare Foods fits the bill perfectly.  At nearly a third the calories of Tofutti, it's an easy way to keep desserts light.  We Can't Say It's Sour Cream has an uneven consistency that makes it not ideal where sour cream is a garnish, but it works great in cakes and biscuits.  I find it most helpful to whisk the product smooth first, before adding to the recipe as directed. 


Nutrition Info:
8 servings (1 portion), Calories 288 

Tasting Notes:
The biscuit topping tasted just like the scones my mom used to bring home from the bakery when I was a kid.  So that was a delicious surprise.  The cobbler was tasty and bursting with fresh blueberry flavor, but I felt like the filling needed a bit... more to earn a higher rating.  Cinnamon, more lemon rind, a squeeze of lemon juice, or a dash of vanilla extract all come to mind.  As it was, a simple, basic dessert, and a nice way to end a warm summer evening.

Rating:
3.5