Monday, October 31, 2011

Chicken Pasanda

Pasanda is a North Indian and Pakistani dish that dates all the way back to the Mughal empire.  Traditionally prepared in a heavy cream sauce, this version relies on much healthier homemade nut butter for a thick, rich sauce.  You'll want to use the pita wedges to scoop the last of the creamy sauce from your plate.

Ingredients:
  • 1/2 cup roasted cashews
  • 2 cups plain non-dairy yogurt
  • 1 cup coarsely chopped onion
  • 1/4 cup fresh-squeezed lemon juice
  • 2 tablespoons peeled and chopped fresh ginger
  • 2 seeded jalapeno peppers
  • 2 and 1/2 teaspoons ground coriander seeds
  • 3/4 teaspoon ground cardamom
  • 3/4 teaspoon ground cinnamon
  • 1/2 teaspoon black pepper
  • 1/4 teaspoon ground cloves
  • 1 teaspoon salt, divided
  • 6 Gardein Tuscan chicken breasts (without sauce)
  • 2 teaspoons canola oil
  • 1 cup cubed pineapple
  • 2 tablespoons chopped roasted cashews
  • 2 tablespoons chopped fresh cilantro
  • 4 (6-inch) pitas
1. Place 1/2 cup cashews in a food processor and process for about 2 minutes, until smooth, scraping down the sides of the bowl once.  Add the yogurt; process until blended.  Set aside.

2. Combine the onion, lemon juice, ginger, and jalapenos in a blender or food processor; process until finely chopped.  Set aside.


3. Place the coriander, cardamom, cinnamon, black pepper, cloves, and 1/2 teaspoon salt in a large zip-top plastic bag.  Cut each chicken piece into thirds, and add the chicken pieces to the bag; seal and shake to coat.


4. Heat the canola oil in a large skillet over medium-high heat.  Add the chicken; cook for 4 minutes on each side.  Remove the chicken from the pan.

5. Add the onion mixture to the pan.  Reduce heat to medium and cook anywhere from 3 to 7 minutes, until the liquid is evaporated, stirring frequently.  Add the remaining 1/2 teaspoon salt and the yogurt mixture; cook for a final 3 minutes, stirring frequently.


6. Spoon 1/2 cup of the yogurt mixture onto the center of each of 6 plates.  Top each serving with 3 chicken pieces, and sprinkle each serving with about 2 and 1/2 tablespoons pineapple, 1 teaspoon chopped cashews, and 1 teaspoon cilantro.  Cut the pitas into 6 wedges each, and place 4 pita wedges on each plate.

Nutrition Info:
6 servings (1/2 cup yogurt mixture, 3 chicken pieces, 2 and 1/2 tablespoons pineapple, 1 teaspoon cashews, 1 teaspoon cilantro, 4 pita wedges), Calories 368 

Tasting Notes:
Easily one of the most visually arresting dishes I've ever made.  And the taste did not disappoint.  The spice-crusted layer on the Gardein chicken was absolutely wonderful. I was curious how the pineapple would fit in with the rest of the dish, but the sweetness was a great contrast to the spice rub and the jalapenos in the yogurt sauce.  The yogurt sauce itself was full of bright jalapeno and ginger flavors.  I would use less onion and jalapeno, though and add more cashews, but the texture was wonderfully creamy.  Much to my surprise, leftovers heated in the microwave the next day were even better.  This may be because I also warmed the leftover pita, which made everything tastier.

Rating:
4

Sunday, October 30, 2011

Jackson Pollock Candied Apples

Named for their resemblance to the splattered paintings of artist Jackson Pollock, these apples are a fun Halloween project - if you have kids, they'll love getting involved with the "artistic" drizzling.  The point here isn't neatness, but a fun smattering of the two different colored chocolates. 

Ingredients:
  • 6 Granny Smith apples
  • 3 ounces dark chocolate
  • 2.5 ounces vegan white chocolate*
1. Wash and dry the apples, and remove the stems.  Stick a wooden popsicle stick into the stem end of each apple.  (Note: I found the sticks at a Michael's craft store, but if you can't find any, try forks instead)


2. Coarsely chop the dark chocolate and place in a glass bowl.  I recommend a bittersweet dark chocolate for this recipe, or about 80% cacao.  Microwave for 1 minute, stirring in 20 second intervals, until melted.


3. Working with 1 apple at a time, hold over the bowl and drizzle with about 2 teaspoons of the chocolate.  Place the apple, stick side up, on a baking sheet lined with wax paper.  Repeat with the remaining apples.


4. Coarsely chop the white chocolate and place in a glass bowl.  Microwave for 1 minute, stirring in 15 to 20 second intervals, until melted.  Working with 1 apple at a time, hold over the bowl and drizzle with about 1 and 1/2 teaspoons white chocolate.  Return to the prepared baking sheet and repeat with the remaining apples.  Chill the apples until ready to serve.

*Several varieties of vegan white chocolate are available these days, all for purchase at places like veganessentials.com.  I used Organica, but it didn't hold its texture very well once melted, so you might consider one of the other brands on the market such as Plamil or Organic Nectars, and see if your results are better.

Nutrition Info:
6 servings (1 apple), Calories 260

Tasting Notes:
Eating these will make you feel like a kid again.  I can't even remember the last time I ate an apple off a stick.  Still, although the green Granny Smith made for a visually arresting presentation, I should have known the end result would be too tart for my taste.  The sweet drizzles of chocolate were not enough to offset the pucker, so next time I would go ahead and sacrifice aesthetics and use a sweet, red variety of apple, in which case I would rate this recipe much higher.

Rating:
2

Vegan Extra:
As a side note, this recipe is a great way to eat apples while they're at peak season.  But if you don't feel like splattering your apples in chocolate, make sure to eat them now anyway.  Some of my favorites for snacking this year have been Jonagolds;


Red Delicious;


and Empires.


Get 'em while they last.

Saturday, October 29, 2011

Apple Cobbler

Before I say anything else tonight, let me first note that I'm just back from an incredible 48 hours at the first National Conference to End Factory Farming, organized by the tireless folks at Farm Sanctuary, and attended by the who's who of the animal rights world.  It was an incredible two days, jam packed with speakers, panels, videos, exhibits, and amazing people who are dedicated to making this world a better place.

Vegans, vegetarians, and meat-eaters alike - get behind this movement.  Absolutely nobody wins in the factory farm system - not the exploited workers, not the environment, not human health, and - most especially - not the billions of animals who live their lives in misery.  Let's build a coalition and make this abominable practice part of the annals of history.

For more on the conference, check out the website: factoryfarmingconference.org

Hopping off my soap box, I'm home and craving comfort food after such an emotional couple days. This warm, easy apple dessert fit the bill.  You may recall my Blueberry Cobbler recipe from back in the summer, which featured "cobbled street" dumplings for the topping.  The cobbled-street appearance is very typical of a New England-style cobbler, whereas this version, featuring a rolled-out rectangle of pie dough on top, is more common in the South. 

Ingredients:
  • 8 cups peeled and sliced Granny Smith apple
  • 1/3 cup apple cider
  • 1/4 cup all-purpose flour
  • 1/2 cup packed vegan brown sugar
  • 1/2 teaspoon ground cinnamon
  • 1 tablespoon vegan butter
  • 1 (8-ounce) pie dough*
  • 1 Ener-G egg
  • 1 tablespoon turbinado sugar
1. Place the apples in an 11x7-inch baking dish, and drizzle the cider over the apples; set aside.

2. Lightly spoon the flour into a dry measuring cup and level with a knife.  Combine the flour, brown sugar, and cinnamon in a bowl.  Cut the butter into small pieces, and cut into the flour mixture with a pastry blender, until the mixture is like coarse meal.  Sprinkle the flour mixture over the apples.


3. Roll the dough into a 12x8-inch rectangle.  Place the dough over the apples; transfer it from your work surface to the baking dish easily by rolling up over a rolling pin for easy transportation.  Fold the edges of the dough under and cut 3 slits in the top so steam can escape while the cobbler bakes.

4. Brush the Ener-G egg over the dough, and sprinkle with the turbinado sugar.

(Note: although you can substitute granulated sugar in a pinch, turbinado adds a pleasing crunch to each bite, so I recommend buying a bag.  As a bonus, because turbinado is never filtered like granulated sugar, there's no need to worry about bone char).

5. Bake the cobbler at 350 degrees for 40 minutes; the crust should be golden brown on top.


*You have two choices on the dough: Buy a frozen variety (such as Wholly Wholesome or Whole Foods) and thaw completely so you can roll the dough into the rectangle required for this recipe.  Or, make your own dough at home.  I chose the latter, since it's easier to roll out homemade dough than the pre-made kind.  It will only take about 10 minutes extra if you follow this easy recipe here.  

Nutrition Info:
8 servings (1 portion), Calories 275 

Tasting Notes:
My favorite part of this dessert was the turbinado sugar on top, a delicious, sugary crunch.  Although the filling was homey and sweet, I was disappointed that the apples cooked down to more like applesauce.  I recommend cutting thick slices of Granny Smith, therefore, so that your cobbler filling holds on to some shape.  I also would liberally increase the amount of cinnamon, and perhaps add a touch of nutmeg and allspice.  Finally, I found this to be tastier chilled than warm, so go ahead and make it ahead of time if you plan to serve to guests.

Rating:
3

Wednesday, October 26, 2011

Cabbage Gremolata

Earlier in the month, I extolled the humble cabbage as a nutritional powerhouse, with a yummy recipe for Braised Red Cabbage with Sausage and Apples.  Here's a second fun cabbage recipe to follow up on the idea.  Whereas my last cabbage recipe had heavy, Scandinavian flavors, this dish is much brighter and lighter.  It plays off of Italian gremolata - a blend of parsley, lemon rind, and garlic - for a pleasantly bright-flavored side dish.  Try it on your next Italian pasta night.

Ingredients:
  • 2 teaspoons vegan butter
  • 1 tablespoon minced shallots
  • 1 minced garlic clove
  • 6 cups thinly sliced green cabbage
  • 2 tablespoons fresh-squeezed lemon juice
  • 2 tablespoons finely chopped fresh parsley
  • 2 teaspoons grated lemon rind
  • 1/4 teaspoon salt
  • 1/8 teaspoon black pepper
1. Melt the butter in a large skillet over medium-high heat.  Add the shallots and garlic; cook for 3 minutes, stirring frequently.  Add the cabbage and lemon juice.  Cover, reduce heat to medium, and cook for 10 minutes, stirring occasionally.


2. Remove from heat and stir in the parsley, lemon rind, salt, and black pepper.  This dish is at its best served immediately.

Nutrition Info:
4 servings (3/4 cup), Calories 63

Tasting Notes:
Like cabbage on sunshine!  Incredible, bright flavor from the fresh lemon juice and lemon rind.  The cabbage was wonderfully tender, and yet retained a pleasing crunch - the perfect consistency, in sum.  This dish is sure to win over even cabbage skeptics.  

Rating:
3.5

Tuesday, October 25, 2011

Edamame with Mustard Vinaigrette

Here's a simple but tasty way to enjoy edamame.  Leftovers pack easily for lunch at work the next day.

Ingredients:
  • 1 and 1/2 tablespoons red wine vinegar
  • 1 tablespoon Dijon mustard
  • 1/2 teaspoon sea salt
  • 1 teaspoon olive oil
  • 1 pound frozen shelled edamame, thawed
  • 1 cup thinly sliced red onion
  • 1/2 cup finely chopped celery
  • 1 tablespoon chopped fresh parsley
1. Whisk together the red wine vinegar, Dijon mustard, and salt in a large bowl.  Add the olive oil and whisk until combined.

2. Cook the edamame in boiling water for 4 minutes.  Add the onion and celery and cook for an additional minute; blanching the onion and celery this way will mellow their flavor, so the edamame can take center stage in this salad.


3. Drain the edamame mixture, and add to the vinegar mixture, tossing to coat.  Stir in the parsley.  Chill for 1 hour before serving.

Nutrition Info:
6 servings (1/2 cup), Calories 124

Tasting Notes:
This dish had nice mellow flavor - I loved the subtle taste of the celery and onion - but I would increase the vinegar, mustard, and salt in the vinaigrette to give it a bit more pop.  The edamame itself had exactly the right chewy texture.

Rating:
3

Friday, October 21, 2011

Vegetarian West African Soup

Earlier in the month I used homemade nut butter (from cashews) to mimic a creamy Alfredo sauce for pasta (see post for Fettuccine with Cashew Cream).  Homemade nut butter can also be used as a thickener in soup, a technique used in the groundnut stew common to many parts of West Africa, notably Senegal and the Gambia.  The stew is based around ground peanuts, tomatoes, and onions, and although many varieties will include meat, such as mutton, you can make the soup vegan in a pinch with the addition of chickpeas.

Ingredients:
  • 2/3 cup roasted peanuts
  • 2 teaspoons canola oil
  • 2 cups chopped onion
  • 6 cups (1-inch) cubed and peeled sweet potato
  • 1 tablespoon ground cumin
  • 1/2 teaspoon black pepper
  • 1/4 teaspoon salt
  • 2 (15.5-ounce) drained cans chickpeas
  • 28 ounces vegetable broth
  • 1 (28-ounce) undrained can diced tomatoes
  • Flat-leaf parsley sprigs (optional for garnish)
1. Place the peanuts in a food processor and process for about 2 minutes, until smooth, scraping down the sides of the bowl once.


2. Heat the canola oil in a Dutch oven over medium-high heat.  Add the onion; saute for 7 minutes.  Add the ground peanuts, sweet potato, cumin, black pepper, salt, chickpeas, broth, and canned tomatoes.  Bring to a boil; reduce heat and simmer, uncovered, for 30 minutes - the sweet potato should be tender.

3. Ladle the soup into bowls and garnish with flat-leaf parsley sprigs for a nice pop of color.

Nutrition Info:
8 servings (1 and 1/2 cups), Calories 477 

Tasting Notes:
A perfect fall soup.  The peanut butter will go into the pan in a clump, but will slowly melt and diffuse into the broth as the stew simmers, resulting in a subtle, peanut-y taste to each bite.  I would up the flavor even more next time by adding a few chopped peanuts.  I worried the 1 tablespoon of cumin would be too spicy, but I actually found myself desiring a bit more spice, something to add another dimension.  Try adding cinnamon or coriander to liven things up.  Aside from that, wonderfully tender sweet potato, super tasty chickpeas, and incredibly filling.   Definitely add the flat-leaf parsley on top - the bright flavor is a welcome contrast to the earthiness of the soup.

Rating:
3.5

Vegan Extra:
An extra note on nut butters: you can certainly go ahead and make more homemade peanut butter than just the amount for this soup - it's a wonderful alternative to the store-bought kind, and perfect for super-fresh peanut butter and jelly sandwiches.  Just keep in mind that it won't keep as long as store-bought peanut butter; store it in the fridge safely for about a month.


Or, try cashew butter; it's a perfect substitute for tahini in any of your favorite hummus recipes, and is also great on sandwiches - try it in a pita pocket with sliced avocado, shredded carrots, and gourmet greens.


Finally, homemade pecan butter will be slightly grainy in texture. Although not the best for spreading onto bagels or sandwiches, it works nicely in a sauce over Gardein chicken.

Thursday, October 20, 2011

Tropical Fruit Ambrosia with Rum

Just a touch of rum is all you need to lift this ambrosia out of the ordinary.  If you prefer not to use alcohol, you can substitute an equal amount of either mango nectar or orange juice in a pinch.  In culinary terms, ambrosia is any citrus fruit salad, and from there the variations are almost endless.  Nearly all versions, however - including this one - are sprinkled with flaked coconut on top.  Toast the coconut ahead of time in a small skillet over medium heat for about 3 to 5 minutes, until golden brown. 

Ingredients:
  • 1/4 cup vegan sugar
  • 1/4 cup water
  • 2 tablespoons white rum (such as Bacardi)
  • 2 tablespoons fresh-squeezed lime juice
  • 2 cups peeled and cubed ripe mango
  • 2 cups peeled and cubed kiwifruit
  • 2 tablespoons toasted flaked coconut
1. Combine the sugar and water in a small saucepan and bring to a boil.  Cook for 1 minute, until the sugar is dissolved.  Remove from heat and stir in the rum and lime juice; cool completely.

2. Combine the mango and kiwifruit in a bowl; add the rum mixture and toss gently to coat. 


3. Divide the fruit mixture evenly among dessert bowls (or martini glasses, which make a beautiful serving dish for this recipe), and sprinkle evenly with the coconut.


Nutrition Info:
4 servings (1 cup fruit, 1 and 1/2 teaspoons coconut), Calories 185 

Tasting Notes:
I was a little skeptical that this recipe might just taste like a big bowl of mango and kiwi, but that was not the case.  First, because of the toasty crispy coconut on top; that rich contrast to the sweet fruit made a big difference.  Second, the rum really did add that little je ne sais quoi - an unexpected touch to an otherwise-ordinary simple syrup.  Third, I chose mango and kiwi that were at their ripest and sweetest, which made all the difference, since both can be a touch astringent when not quite ripe.  All of which combined for a wonderfully refreshing, sweet little finish to the evening.

Rating:
3.5

Wednesday, October 19, 2011

Marinated Grilled Apples with Mint

Here's a great way to eat apples while they're at their fall best; tart Granny Smith apples get a stint in a sweet-and-spicy marinade, and are then grilled as a side dish. 

Ingredients:
  • 2/3 cup fresh-squeezed orange juice
  • 1 tablespoon chopped fresh mint
  • 2 tablespoons agave nectar
  • 1 teaspoon vanilla extract
  • 1/2 teaspoon ground ginger
  • 1/4 teaspoon black pepper
  • 3 Granny Smith apples
  • Cooking spray
1. Combine the orange juice, mint, agave, vanilla, ginger, and black pepper in a large zip-top plastic bag.  Take the extra effort to squeeze out a fresh juice orange (such as Valencia) instead of using bottled orange juice, for wonderful fresh flavor.


2. Core the apples, and cut each into 4 (1/2-inch thick) slices.  Place the apple slices in the bag and seal; marinate in the fridge for 1 to 2 hours, turning the bag occasionally.

Note: as with my recipe for Baked Apple Rings with Caramel Sauce, I highly recommend a good old-fashioned apple corer, which will give you perfect apple slices every time.


3. Remove the apple slices from the bag, and reserve the marinade.  Grill the apples on an outdoor grill or indoor grill pan coated with cooking spray for 6 minutes, turning and basting frequently with the marinade.

4. Arrange the apples on a platter, and drizzle with any remaining marinade.  Try serving alongside Match pork or Gardein chicken for a savory dinner.


Nutrition Info:
4 servings (3 apple slices), Calories 116

Tasting Notes:
The apples were warm and tender off the grill, with great zesty flavors of orange and lime to every bite. Granny Smith aren't normally my favorite apples, but the tartness worked perfectly in this recipe.  I would increase the amount of ginger next time to add a little more zing, and make these apples even tastier.

Update:
I had a batch of sweet Pink Lady apples, and decided to re-make a dessert version of this recipe. Prepare exactly as above, only using Pink Lady apples instead, and serve warm for dessert.


Try topping with your favorite vanilla non-dairy ice cream, for a nice contrast between the ice cream and warm apple. The ginger flavor tasted better in this sweet version. 


Rating:
3.5

Tuesday, October 18, 2011

Fettuccine with Cashew Cream

Making nut butters at home is incredibly easy, and quite fun.  Even though you can find just about any nut butter on the shelves these days at health food stores, the homemade version is much cheaper.  This pasta dish uses a creamy mix of cashew butter and water to replace the heavy cream-based sauce of a traditional fettuccine Alfredo.

Ingredients:
  • 1/2 cup roasted cashews
  • 1 and 1/4 cups water
  • Cooking spray
  • 3 minced garlic cloves
  • 4 cups hot cooked fettuccine*
  • 1/4 cup grated vegan cheese
  • 1/4 teaspoon black pepper
  • 1/8 teaspoon salt
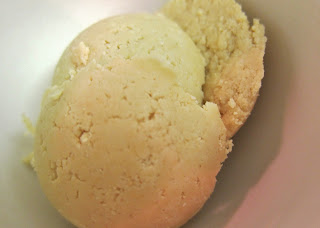
1. Place the cashews in a food processor and process for about 2 minutes, until smooth, scraping down the sides of the bowl once.  Add the water while the processor is on, and process until smooth, scraping down the sides of the bowl once.


2. Place the cashew mixture in a small saucepan and bring to a boil over medium-high heat, stirring occasionally with a whisk.  Reduce heat and simmer for 1 minute; the cream will be thick.  Indeed, I was amazed that a mixture of nothing more than nuts and water would grow so wonderfully thick in just one minute - a great discovery.

3. Heat a large skillet coated with cooking spray over medium-high heat.  Add the garlic and saute for 30 seconds.  Add the cashew cream, cooked fettuccine, cheese, black pepper, and salt.  Cook for a final few minutes until thoroughly heated.


Note: I used the vegan mozzarella from Galaxy Foods tonight.  Use your favorite vegan cheese or even nutritional yeast for "cheesiness" instead if you prefer.

*Start boiling the water for the pasta when you begin the rest of the recipe.  That way your pasta will be done at the right moment.  Start with 8 ounces uncooked fettuccine to yield 4 cups cooked.

Nutrition Info:
4 servings (1 and 1/3 cups), Calories 378 

Tasting Notes:
Although I was pleasantly surprised at the creamy thickness of the cashew cream - it coated the pasta perfectly, and if I had been served this in a restaurant, I would never guess it wasn't cream-based - I was also disappointed to find that the recipe was bland.  You'll definitely want to add more salt and pepper.  I also think that some vegetable additions couldn't hurt... so much so in fact that I stirred together the fettuccine and the green peas on my plate midway through eating.  Wilted spinach or chopped broccoli would probably also taste great. 

Rating:
3

Monday, October 17, 2011

Chipotle Mashed Sweet Potatoes

Earlier in the month, I made the simplest mashed potatoes imaginable - see post for Basic Mashed Potatoes.  Here's a fun variation, using sweet potatoes instead of baking potatoes, and adding chipotle chiles for spice and brown sugar for sweetness.  You only need 2 of the chipotles from a 7-ounce can for this recipe; reserve the remaining chipotles and adobo sauce for another use.  I particularly like tempeh marinated in the adobo sauce and added to burritos. Or, try stir-frying leafy greens with a couple chopped chipotles for a quick side dish. 

Ingredients:
  • 2 and 1/2 pounds peeled and cubed sweet potato
  • 1/2 cup plain non-dairy creamer
  • 3 tablespoons vegan butter
  • 2 tablespoons fresh-squeezed lime juice
  • 1 (7-ounce) can chipotle chiles in adobo sauce (such as Casa Fiesta)
  • 1/2 cup packed vegan brown sugar
  • 3/4 teaspoon salt
  • 3/4 teaspoon ground cinnamon, divided
1. Place the sweet potato in a saucepan and cover with water.  Bring to a boil; reduce heat and simmer for about 15 minutes, until the potato is tender.

2. Drain, and return the sweet potato to the pan.  Add the creamer, butter, and lime juice; mash with a potato masher to desired consistency.  Return to the burner and cook for 2 minutes, stirring constantly, until heated through.

3. Remove 2 chiles from the can of chipotles and chop; reserve the remaining chipotles and adobo sauce for another use.  Add the chopped chiles to the sweet potato mixture, along with the brown sugar, salt, and 1/2 teaspoon cinnamon.  Spoon into a serving bowl and sprinkle with the remaining 1/4 teaspoon cinnamon.


As a main dish to pair with these sweet potatoes, you'll need something equally flavorful and full of spice to stand up to the chipotle.  Try rubbing a mixture of cumin and coriander over your favorite veggie protein, whether tempeh, seitan, or a serving of Match meat. I used Match pork and added green peas on the side to round out the meal, which made for a perfect fall evening.


Nutrition Info:
8 servings (about 2/3 cup), Calories 264 

Tasting Notes:
Any less brown sugar, and these would have been too spicy.  Any less chipotle, and they would have been too sweet.  So as you can guess, the balance was just right; a tingle on the tongue from the chiles, followed by a burst of sweetness from the sugar.  Very close in taste to streuseled sweet potatoes.  The only flavor I missed was the lime juice; it smelled delicious while I was mashing the potatoes and lime together, but by the time the chipotle and brown sugar were added in, that flavor got lost.  Go ahead and add a little bit more lime juice to taste.

Rating:
4

Friday, October 14, 2011

Potato-Kale Soup with Cheese

This main-dish soup is wonderfully flavorful and earthy. Try hosting a fun beer-and-food pairing with the soup and bread duo.  I really enjoyed serving with brown ale and pilsner, both from vegan-friendly Brooklyn Brewery. 

Ingredients:
  • 2 tablespoons vegan butter
  • 1 and 1/2 cups finely chopped onion
  • 1 minced garlic clove
  • 7 cups vegan chicken broth (prepared from Not Chick'n bouillon)
  • 4 cups coarsely chopped and peeled Yukon gold potato
  • 1/4 teaspoon salt
  • 1 bay leaf
  • 6 cups chopped kale
  • 1 teaspoon dried basil
  • 9 tablespoons shredded vegan cheese*
1. Melt the butter in a large saucepan over medium heat.  Add the onion and cook for 8 minutes, stirring frequently.  Add the garlic; cook for 30 seconds, stirring constantly.

2. Stir in the broth, potatoes, salt, and bay leaf.  Bring to a boil, then cover, reduce heat, and simmer for 15 minutes - the potato should be tender.

3. Stir in the kale and dried basil.  Cover and simmer for 10 minutes, until the kale is tender.  Discard the bay leaf.  Use a potato masher to partially mash the potatoes in the soup, until chunky.  Ladle the soup into serving bowls and top with the cheese of your choice. 


*My pick, to complement the flavors in this dish, is the Gouda from Sheese, or any other vegan cheese you like that is similar to a nutty Gruyere.

Nutrition Info:
6 servings (1 and 2/3 cups soup, 1 and 1/2 tablespoons cheese), Calories 239 

Tasting Notes:
I was worried, as I ladled the soup into bowls, that it would be too watery and therefore bland.  And - although yes, a touch thin - the soup was incredibly flavorful.  Mostly, I think, from the bouillon cubes, but also great dried basil and bay leaf flavor - and the pop of the cheese on top was perfect.  Next time I would simply use less broth (closer to 4 or 5 cups) to address the watery issue, and add both more potato and more kale.  Then you'll really have a thick, chunky bowlful.


Update: serve this soup with my Walnut and Rosemary Loaves - the flavor combination is perfect, and you'll want to use the bread to sop up the last bits of broth from your bowl.

Rating:
4

Thursday, October 13, 2011

Walnut and Rosemary Loaves

I took the afternoon to bake bread today, something I haven't done in quite some time, and one of my favorite activities when the temperature drops.  These rustic loaves are so much better than sliced bread from the store; dark on the outside, they will stay light and almost creamy on the inside.  This recipe makes enough for 2 loaves, so you can eat one now and freeze the other for later.  Plus, you'll get a dose of your omega-3's from the walnuts.

Ingredients:
  • 2 cups warm non-dairy milk (between 100 and 110 degrees)
  • 1/4 cup warm water (between 100 and 110 degrees)
  • 3 tablespoons vegan sugar
  • 2 tablespoons melted vegan butter
  • 2 teaspoons salt
  • 2 packages dry yeast (4 and 1/2 teaspoons)
  • 5 and 1/2 cups all-purpose flour, divided
  • 1 cup chopped walnuts
  • 3 tablespoons coarsely chopped fresh rosemary
  • 2 Ener-G eggs, divided
  • Cooking spray
  • 1 tablespoon yellow cornmeal
  • 1 tablespoon plain non-dairy milk
1. Combine the warm milk, warm water, sugar, butter, and salt in a bowl, stirring with a whisk until combined.  Add the yeast; let stand for 5 minutes.  The mixture will foam up in that time, as the yeast activates; I love watching the process, like a mini little volcano bubbling to the surface.


2.  Lightly spoon the flour into dry measuring cups, and level with a knife.  Add 2 cups of the flour to the yeast mixture, stirring with a whisk until smooth; cover and let rise for 15 minutes.

3. Add an additional 2 and 1/2 cups flour, the walnuts, the rosemary, and 1 Ener-G egg to the yeast mixture. 


4. Turn the dough out onto a lightly floured surface and knead until smooth and elastic.  Add the remaining 1 cup flour, 1/4 cup at a time, to prevent the dough from sticking to your hands.  If you need a quick reminder on the steps to kneading, check out this link: www.wikihow.com/Knead-Dough

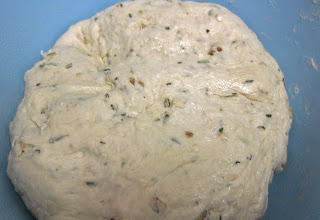
Note: this is a very wet, sticky dough, so I actually added 1/2 cup of the extra flour while still stirring in the bowl, before turning the dough onto a surface to knead.  Once kneading, I only did so for about 5 minutes, until all the flour was incorporated and the dough felt elastic enough - much less time than the 10 minutes or so normally needed.  It turned out to be the right decision though, because if you keep kneading and adding extra flour, you'll lose the creamy texture of the final product.

5. Place the dough in a large bowl coated with cooking spray, turning so the top is coated as well.  Cover and let rise for 1 hour.  I like to let dough rise in a closed, unheated oven where it will be warm and free from drafts. 


6. Punch the dough down and turn out onto a lightly floured surface (using floured hands was helpful here as well, since the dough is sticky).  Divide the dough in half and shape each portion into a round.  Place on a baking sheet dusted with the cornmeal.  Cover and let rise for 30 minutes.

7. Combine 1 tablespoon milk with the second Ener-G egg, and brush evenly over the top of the loaves.  Make 3 (1/4-inch deep) diagonal cuts across the top of each loaf with a sharp knife.

8. Place the loaves in an oven preheated to 400 degrees, but immediately lower the temperature to 375 degrees once the bread is inside.  Bake at 375 degrees for 40 minutes - the loaves should sound hollow when tapped.  Let stand for at least 20 minutes before slicing. 


Serve the bread on its own, with a bowl of soup, or to make sandwiches; I particularly enjoyed it with a Tofurky-and-tomato filling. 


Nutrition Info:
2 loaves, 12 servings per loaf (1 slice), Calories 170 

Tasting Notes:
I would call this bread practically perfect, except I don't want to sound as though I'm touting my own bread-making skills.  But wow - the walnut and rosemary not only smelled amazing all through the kneading and baking process, but tasted absolutely incredible - like Christmas, if that makes sense.  The crust had the perfect crunch and the interior was soft, creamy and light.   Tomorrow night, I intend to make a soup tailor-made as a partner for these loaves, so stay tuned.

Rating:
5