Wednesday, October 12, 2011

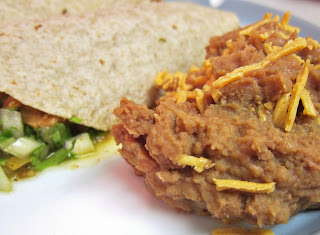
Pork and Pineapple Tacos

These fun tacos have a little bit of a Hawaiian feel, a welcome change away from a dreary day outside my New York window.

Ingredients:
  • 3/4 cup chopped onion
  • 1/2 cup minced fresh cilantro
  • 1 teaspoon canola oil
  • 1 teaspoon chipotle chile pepper powder
  • 1 teaspoon chili powder
  • 1/2 teaspoon salt
  • 12 ounces Match pork, thawed
  • 1 (15-ounce) undrained can pineapple tidbits in juice (such as Native Forest)
  • 6 (6-inch) flour tortillas
  • 3/4 cup salsa verde
1. Combine the onion and cilantro in a bowl; set aside.

2. Heat the canola oil in a large skillet over medium-high heat.  Coarsely chop the Match pork, and combine in a bowl with the chipotle chile powder, chili powder, and salt.  Add the pork mixture to the skillet and saute for 4 minutes, until browned.  Remove from the pan.


3. Add the canned pineapple to the pan and bring to a boil.  Cook for 5 to 7 minutes, until the juice is slightly thickened.  Return the pork mixture to the pan and cook for a final minute.

4. Meanwhile, warm the tortillas according to package directions.  Fill each tortilla with 2/3 cup pork mixture, 2 to 3 tablespoons onion mixture, and 2 tablespoons salsa verde.  Roll up to serve.


To round out the meal, I served refried pinto beans (try Whole Foods 365 brand), and topped with melted shredded Daiya cheddar. 


Nutrition Info:
6 servings (1 taco), Calories 310 

Tasting Notes:
These tacos were the perfect balance of spicy and sweet - a balance often attempted, and rarely achieved, in my opinion.  The sweet pineapple was the perfect foil to the blend of chili powders and the savory pork.  Great fresh cilantro. I'd have fun playing around with the pork-and-pineapple filling for more than just tacos, perhaps on homemade pizza dough, or even English muffins for little mini pizzas.  My only complaint is that the filling was a bit watery; next time I would drain the can of pineapple tidbits.

Rating:
4

Tuesday, October 11, 2011

Tortitas de Maiz

I couldn't find much anecdotal information about this recipe, since every Google search for tortitas de maiz took me to a Spanish-language website, and, alas, I speak no Spanish.  From what I can gather, however, these thick corn cakes are a traditional Mexican breakfast food (and I would guess elsewhere in Latin America), very much like a sweetened version of polenta.

Ingredients:
  • 1 cup water
  • 1 cup plain non-dairy milk
  • 1/2 cup vegan sugar
  • 2 tablespoons vegan butter
  • 1/4 teaspoon salt
  • 1 and 1/2 cups yellow cornmeal
  • 1 tablespoon vanilla extract
  • 3 Ener-G eggs
  • Cooking spray
1. Combine the water, milk, sugar, butter, and salt in a saucepan and bring to a boil.  Gradually add the cornmeal, stirring constantly with a whisk.  Remove from heat and let stand for 10 minutes.  Stir in the vanilla extract and Ener-G eggs.

Note: the mixture will be very thick while it stands, as shown below, but becomes watery enough to be deemed batter again after adding the vanilla and Ener-G eggs.


2. Heat a skillet or griddle coated with cooking spray over medium-high heat.  Spoon 1/3 cup batter per tortita onto the pan.  Cook for about 2 and 1/2 minutes to 3 minutes on each side, until nicely golden brown.  Repeat with the remaining batter to make 9 tortitas total.


Note: I preferred using my griddle because that way I could work in batches, rather than making 1 tortita at a time.  If you use a skillet, I recommend making only 1 at a time, so that you have room to flip the corn cake over.  I also found that, since the batter was thick, it helped to flatten each portion with a spatula once on the griddle; it doesn't spread the way, for example, pancake batter does.

You can serve the tortitas plain, or top them with fresh fruit, a little maple syrup, or vegan powdered sugar for a yummy treat.


Nutrition Info:
9 servings (1 cake), Calories 192 

Tasting Notes:
Oh my goodness.  For whatever reason, I was expecting this to taste like a pancake made with cornmeal instead of flour, but no.  No, this is just about the yummiest, sweetest "polenta" you'll ever come across.  So sweet in fact that the corn cakes truly need no embellishment...although when topped with powdered sugar and maple syrup they were heavenly and verged right into "5" territory. 

Rating:
4

Monday, October 10, 2011

Basic Mashed Potatoes

Despite lingering warm weather, we've moved in to what I consider mashed potato season.  I figured it only made sense to start off with the most basic version possible, and move on to fancier variations on mashed potatoes as the fall and winter progress. Stay tuned.

Ingredients:
  • 3 pounds peeled and cubed baking potato
  • 1/2 cup plain non-dairy milk
  • 1/2 cup vegan chicken broth (prepared from Not Chick'n bouillon)
  • 3 tablespoons vegan sour cream
  • 1 teaspoon salt
  • 1/2 teaspoon black pepper
  • 1/4 cup vegan butter
1. Place the potato in a saucepan and cover with water.  Bring to a boil; reduce heat and simmer for about 15 minutes, until the potatoes are tender.


2. Drain, and return the potatoes to the pan.  Add the milk and broth; mash to desired consistency with a potato masher.  Return to the burner and cook for about 2 minutes, stirring constantly, until thoroughly heated.  Stir in the sour cream, salt, and black pepper.  Spoon into a serving bowl and top with the butter.

A couple tips for even better mashed potatoes: if you have a ricer, this recipe is the perfect opportunity to use it.  Although not ideal when a mashed potato recipe calls for Yukon golds or red potatoes, a ricer is perfect for dry-textured potatoes like russets.  Another trick is to warm up the milk and broth before adding to the recipe as directed, which will reduce your risk of lumps.

A super-basic recipe like this calls for comfort food. Tonight I had the Roma-style baked tofu from West Soy and wilted spinach.


Nutrition Info:
8 servings (about 3/4 cup), Calories 162 

Tasting Notes:
It's not often that I eat a recipe so decadently (Earth Balance) buttery, so that made these potatoes wonderfully indulgent.  I worried there would be too much salt and pepper, but was delighted to find that wasn't the case.  Instead, these potatoes had a nice, creamy richness from the soy milk.  I would add just a touch more sour cream next time, for stronger tangy taste.  But in sum, a great "basic."

Rating:
3.5

Sunday, October 9, 2011

Teriyaki Tofu Steaks with Soba Noodles

As is the case for many vegans, I'm sure, I'm always on a quest for new tofu recipes.  Teriyaki here refers not to the bottled sauce, but to the true meaning in Japanese cuisine: the technique of cooking food in a soy sauce marinade.

Ingredients:
  • 1 pound extra-firm tofu
  • 1/4 cup mirin
  • 1/4 cup low-sodium soy sauce
  • 1 tablespoon finely chopped and peeled fresh ginger
  • 2 tablespoons sake*
  • 2 tablespoons rice vinegar
  • 1 tablespoon dark sesame oil
  • 2 tablespoons agave nectar
  • 1/2 teaspoon crushed red pepper
  • 1 minced garlic clove
  • 1/2 cup vegetable broth
  • 4 heads baby bok choy (1 and 1/2 pounds total)
  • 4 cups cooked soba noodles
  • 1/4 cup thinly sliced green onions
  • 2 teaspoons toasted sesame seeds**
1. Drain the tofu and place between several layers of paper towels.  Place a heavy plate on top of the tofu and let stand for 20 minutes; doing so ensures a nice firm texture to your final product.  If you don't have a plate that's very heavy, try placing a 15-ounce can (soup or beans work great) on top to weight it down.  Cut the tofu crosswise into 4 pieces; set aside.

2. Combine the mirin, soy sauce, ginger, sake, rice vinegar, sesame oil, agave, crushed red pepper, and garlic in a bowl, stirring with a whisk.  Set aside.

3. Heat a large skillet over medium-high heat.  Add the tofu pieces, and pour the mirin mixture over the tofu.  Bring to a boil; continue to cook for 4 minutes.  Turn the tofu pieces over and cook for an additional 3 minutes.


4. Meanwhile, bring the vegetable broth to a boil in a Dutch oven.  Cut each baby bok choy head in half, and add the bok choy to the pan; cover and cook for 2 minutes.  Drain.

5. Meanwhile, cook the soba noodles according to package directions and drain (start with about 8 ounces uncooked noodles to yield the right amount for this recipe).  Place 1 cup of soba on each of 4 plates.  Top each serving with 1 tofu piece.  Spoon 1 tablespoon of the mirin sauce over each tofu piece, and sprinkle each serving with 1 tablespoon green onions and 1/2 teaspoon sesame seeds.  Finish off each serving with 2 bok choy halves.

*As is the case with wine from grapes, sake (rice wine) is often filtered through animal byproducts - most commonly isinglass, from fish.  Since it can be hard to track down individual producers and find out how they filter their product, I bypass the problem entirely by buying sake nigori (unfiltered).  It will be clearly labeled as such, and you'll also notice a fine white sediment in the bottom of the bottle.  Problem solved. 


**Quickly toast your sesame seeds in a skillet over medium heat for about 3 to 4 minutes, until the sesame seeds are fragrant and lightly browned.

Nutrition Info:
4 servings (1 cup soba, 1 tofu piece, 1 tablespoon sauce, 1 tablespoon green onions, 1/2 teaspoon sesame seeds, 2 bok choy halves), Calories 331 

Tasting Notes:
Let me first say the tofu was wonderful - it had the dense, concentrated texture of store-bought baked tofu, which I wouldn't have believed I could replicate so well at home.  The glaze on the outside had just the right hints of sweet and spice.  The rest of the dish, alas, needs definite improvement, and is the reason my rating tonight is so low.  1 tablespoon of sauce per serving was nowhere near enough.  I recommend making a double batch of soy sauce mixture, and tossing the soba noodles with the second batch, so they are flavorful.  As is, they are plain and bland.  I also recommend steaming the bok choy longer; they were too crisp and a touch bitter after only a two minute steam.  I also found that the raw green onions sprinkled on top had too much of a bite; I would stir-fry in a little sesame oil next time before sprinkling on top. 

Rating:
2

Friday, October 7, 2011

Ragu Finto with Cheese Polenta

I considered changing the title of this recipe, since it makes me bristle.  Finto means 'fake' in Italian, with the implication that this ragu somehow wasn't real because it doesn't contain meat.  Well, it tasted quite real enough to me thank you very much.  Real savory tomatoes and porcini mushrooms, real homemade polenta, and very real to the taste buds and tummy.  To be fair, a ragu is defined in the dictionary as any meat-based sauce, hence this finto version tonight.  But hopefully you'll find it quite real in satisfying your hunger.

Ingredients:
For the ragu:
  • 2 cups boiling water, divided
  • 1/2 cup dried porcini mushrooms 
  • 1 cup sun-dried tomatoes, packed without oil
  • 1 tablespoon olive oil
  • 1 and 1/2 cups finely chopped red onion
  • 1 tablespoon minced garlic
  • 5 cups finely chopped cremini mushrooms
  • 2 teaspoons minced fresh rosemary
  • 1/2 teaspoon salt
  • 1/4 teaspoon crushed red pepper
  • 1 cup vegan dry red wine
  • 2 tablespoons minced flat-leaf parsley
For the polenta:
  • 3/4 cup yellow cornmeal
  • 1/4 teaspoon salt
  • 1 and 1/2 cups water
  • 1 and 1/2 cups plain non-dairy milk
  • 1/2 cup shredded vegan cheese
  • 2 tablespoons vegan Parmesan sprinkles (such as Galaxy Foods)
1. To prepare the ragu, cover the dried porcinis with 1 cup boiling water in a bowl; cover and let stand for 15 minutes.  Drain the porcinis through a sieve over a bowl, and reserve the soaking liquid.  Discard the porcini stems.  Finely chop the porcini caps; set aside.


2. At the same time, cover the sun-dried tomatoes with 1 cup boiling water in a bowl. Cover and let stand for 15 minutes.  Drain and finely chop the tomatoes; set aside.

3. Heat the olive oil in a Dutch oven over medium heat.  Add the red onion and garlic; cover and cook for 10 minutes, stirring occasionally. 


4. Add the cremini mushrooms, rosemary, 1/2 teaspoon salt, and crushed red pepper.  Cover and cook for 5 minutes.  Uncover and cook for a final 5 minutes, until the liquid is almost all evaporated.

Note: this mixture of aromatics and finely chopped vegetables is known as a "soffritto" in an Italian ragu.  Not to be confused with bottled sofrito (often a mix of tomato, onion, and peppers), it refers to the vegetables that are sauteed in fat (in this case olive oil) as the base of a ragu, to help develop a rich, hearty flavor.

5. Add the chopped porcini caps, the reserved soaking liquid, the chopped sun-dried tomatoes, the red wine, and the flat-leaf parsley.  Bring to a boil; reduce heat and simmer for 12 minutes.


6. Meanwhile, prepare the polenta: place the cornmeal and 1/4 teaspoon salt in a saucepan.  Gradually add the water and milk, stirring constantly with a whisk.  Bring the mixture to a boil, then reduce heat to medium and cook for 5 minutes, stirring frequently, until thickened.

7. Remove from heat and stir in the shredded cheese of your choice.  I liked the Gouda from Sheese in this recipe, which mimics a sharp, nutty cheese like Gruyere.

Note: you'll wind up with a soft polenta, so don't expect it to be as firm as the store-bought kind in a tube.  Still creamy enough to stir, the polenta will also be thick enough to hold its shape, as shown in the picture below.


8. Place 1 cup polenta on each of 4 shallow plates or bowls, and top each serving with 1 cup ragu.  Sprinkle each serving with 1 and 1/2 teaspoons Parmesan sprinkles.


Nutrition Info:
4 servings (1 cup polenta, 1 cup ragu, 1 and 1/2 teaspoons Parmesan), Calories 334 

Tasting Notes:
The amazing sun-dried tomato flavor hit me first, followed by the richness of the porcini broth.  The polenta was creamy with a nice touch from the cheese.  There was perhaps the tiniest bit too much red wine in the broth - I would decrease the amount to 3/4 cup next time.  That would also help solve the problem that the ragu is a little too watery.  I would either evaporate off more liquid next time, or serve over a pasta like linguine, which would soak up a bit more sauce than the polenta did.  But a very filling one-dish dinner, and verging on "5" for taste.

Rating:
4

Wednesday, October 5, 2011

Pork Studded with Rosemary and Garlic

Tonight is the first time I'm baking Match pork as a full "tenderloin" roasted in the oven, rather than cooking individual portions in a skillet.  Read on for the entree plus a couple complimentary side dishes.

Ingredients:
  • 2 tablespoons finely chopped fresh rosemary
  • 4 minced garlic cloves
  • 12 ounces Match pork, thawed
  • 1/2 teaspoon salt
  • 1/4 teaspoon black pepper
  • Cooking spray
1. Combine the rosemary and garlic in a small bowl.  Set aside.


2. Shape the Match pork into a log (about 8 inches long and 2 inches thick), and cut several 1/2-inch deep slits along the top.  Place half of the rosemary mixture in the slits, and rub the remaining rosemary mixture over the pork.  Sprinkle evenly with the salt and black pepper.


3. Place the pork on a jelly roll pan or baking sheet coated with cooking spray.  Bake at 475 degrees for 15 to 20 minutes.  Let stand for 5 minutes, then cut into 1/4-inch thick slices.

Serve this dish with quick veggie side dishes.  For the first, cut small red potatoes into halves or quarters (depending on size) and cook in boiling water just until tender - about 10 minutes.  For the second, make simple caramelized carrots: toss together 1 pound packaged baby carrots, 1 tablespoon low-sodium soy sauce, 2 teaspoons vegan brown sugar, 2 teaspoons olive oil, 1/4 teaspoon salt, and 1/4 teaspoon black pepper.  Place on a baking sheet coated with cooking spray and slip into the oven with the pork for 15 minutes, stirring halfway through.


Nutrition Info:
4 servings (3 ounces pork), Calories 147

Tasting Notes:
Exactly what you'd expect from the ingredient list - garlic, and rosemary, and salt.  So yum.  For whatever reason, the "pork"y flavor of the Match was stronger when roasted this way than when I've cooked it in a skillet.  It was a bit of a jolt to my taste buds, but tender and savory.  As a bonus, this whole meal came together in 20 minutes.  The only glitch tonight?  When I was caramelizing the carrots, the brown sugar mixture coalesced on one corner of the baking sheet and burned...setting off my apartment's fire alarm.  I had to emphatically tell the device that nothing was burning, but it did not want to listen to me.  So consider baking the carrots in a small (8-inch) baking dish, to prevent your liquid from going one way, while your baby carrots go another. 

Rating:
3

Tuesday, October 4, 2011

Baked Apple Rings with Caramel Sauce

When I think of fall, I instantly think of the smell of apples in the air, of apple picking, bobbing for apples as a child, and of apple cider.  This recipe makes delicious use of fresh apples in an apple cider-spiked batter - what could be more autumnal than that?

Ingredients:
  • 4 Golden Delicious apples
  • 3/4 cup plus 2 tablespoons all-purpose flour
  • 1 tablespoon vegan sugar
  • 1/4 teaspoon salt
  • Dash of ground nutmeg
  • 1/3 cup apple cider
  • 2 Ener-G eggs
  • Cooking spray
  • 1/4 cup caramel sundae syrup (such as Fun Fresh Foods)
  • Vegan powdered sugar (optional for garnish)
1. Peel and core the apples, and slice crosswise into 1/2-inch thick slices.  Use the 8 largest slices from the middle of the apples for this recipe, and reserve the remaining apple for another use.  (One idea is to stir fresh apple pieces into a bowl of hearty oatmeal for breakfast - fresh apple is a vast improvement over freeze-dried apple in instant oatmeal).

Note: if you don't have an apple corer, I recommend buying one.  Perhaps one of the simplest kitchen gadgets out there, this low-tech item does wonders for creating perfect apple rings.


2. Lightly spoon the flour into dry measuring cups and level with a knife.  Combine the flour, sugar, salt, and nutmeg in a bowl.  Add the apple cider and Ener-G eggs and stir to combine; the batter will be thick.


3. Heat a large skillet coated with cooking spray over medium-high heat.  Dip 4 of the apple slices in the batter and add to the pan; cook for 2 minutes on each side, until lightly browned.  Transfer to a baking sheet coated with cooking spray.  Coat the remaining 4 apple slices in the batter and cook for 2 minutes on each side. Transfer to the baking sheet.


4. Lightly coat the apple slices with cooking spray and bake at 400 degrees for 10 minutes - the edges should be nicely crisp.

5.  Drizzle each of 4 dessert plates with 1 tablespoon caramel syrup, and place 2 apple slices on each plate.  I think a dusting of powdered sugar makes a lovely garnish, but you could also serve this dessert without it.  Either way, the apples will be at their best served immediately.

Nutrition Info:
4 servings (2 apple slices, 1 tablespoon caramel syrup), Calories 205 

Tasting Notes:
This was a great twist on the classic caramel-apple duo.  It was much like eating a crepe inside-out: a thick piece of apple coated in a light, thin, crepe-like batter, as opposed to a crepe stuffed with apples.  The caramel syrup was of course scrumptious in combination with the soft baked apple.  The apple cider wasn't detectable enough in the batter - my only complaint.  Unfortunately I'm not sure how to resolve the issue, since increasing the amount of apple cider would ruin the consistency of the batter.  Next time, I'd make an apple cider reduction glaze to drizzle over the apple rings just before serving.

Rating:
4